The PPC Optimizer for Amazon app helps to automatically launch and direct the most profitable ads.
How PPC Optimizer for Amazon Can Help You
The PPC Optimizer for Amazon app helps you build and refine Amazon advertising campaigns by:
- Polishing existing ad language: The app will automatically find a list of relevant keywords and automatically add them to your ad scenario for better optimization. Even then, it allows you to manually add keywords to your liking.
- Adapting to your specified ACoS and other target specs: The app automates your bids factoring in crucial advertising aspects and various parameters that might be hard to reconcile if you are new to Amazon ads. For the advanced users there is a manual mode that lets you control every change.
- Collecting lucrative keywords: Each search query that leads to a sale triggers the app to set a parameter so that the right keyword is matched to, and created in, the right ad campaign
- Creating a list of negative keywords: The app isolates negative keywords, which allows you to avoid keyword cannibalization and competition overlap
- Synchronizing data more quickly: A synchronization occurs once every hour. This means you’re always up to date on what’s happening in the Amazon ad landscape.
Accessing PPC Optimizer for Amazon
PPC Optimizer for Amazon is available for purchase to users with an active paid Semrush subscription. It also offers a free 7-days trial period.
By default, the PPC Optimizer for Amazon app has a budget limit for campaigns of $3000. You can purchase an additional $1000 of budget. Go to “My apps”, find the PPC Optimizer for Amazon app in the list, click “In-app purchases” under the app title.
To learn more about Semrush subscription plans and to compare their features, visit our pricing guide page.
To find out how to add an app, you can visit the App Center’s guide on how to add apps.
How To Use PPC Optimizer for Amazon
Step 1: Share access to your Amazon account and do a token transfer
To use the app, you will need to connect your Amazon Advertising account using your Merchant Token number. This enables the app to determine the list of products available for advertising, monitoring PPC campaign metrics, and optimizing advertising campaigns.

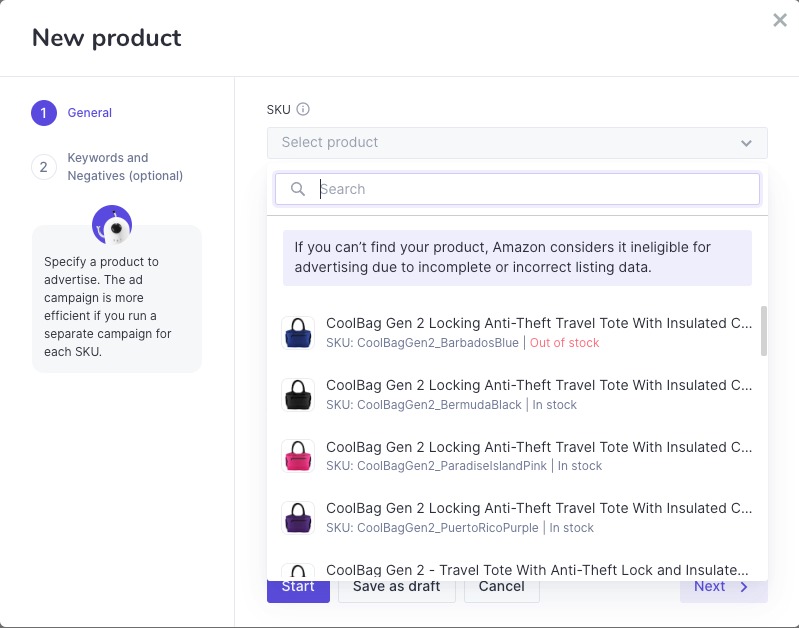
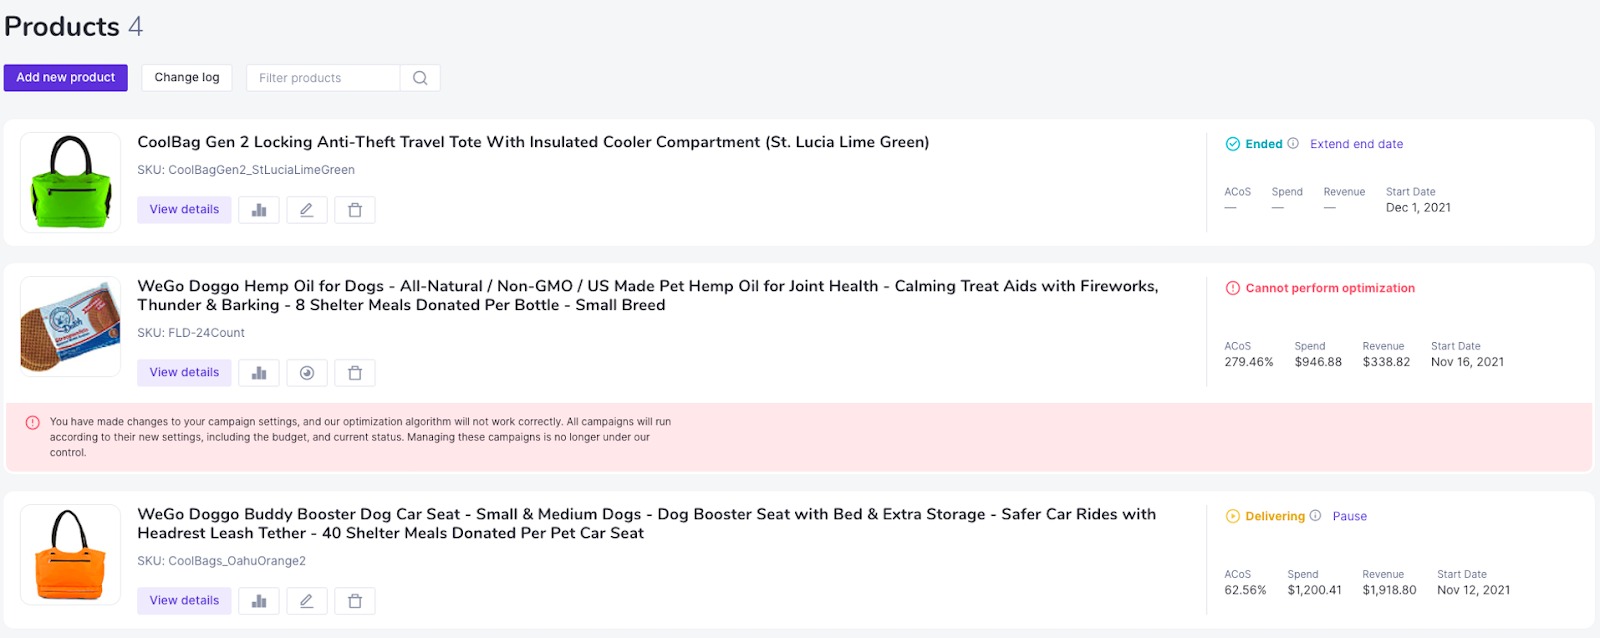
Step 2: Pick the product (SKU) you want to advertise
Once you have integrated your seller’s account, the app will automatically create a list of your available products. Select the products you want to feature in your scenario, either via the dropdown menu or by searching manually.
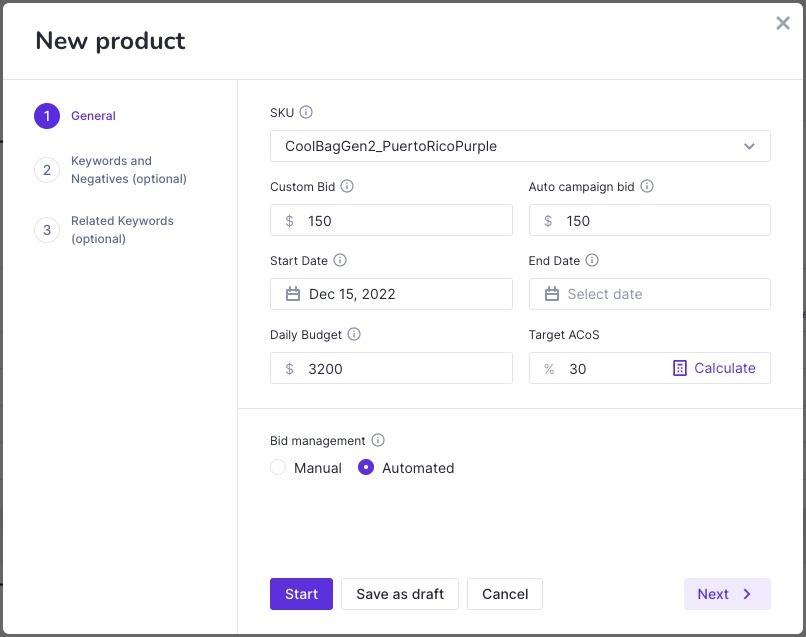
Step 3. Set up your ad scenario details
Before starting your scenario, you will need to add in some parameters:
- Custom bid (the maximum amount you want to pay per click)
- Auto campaign bid (maximum pay per click amount if the automated bid management type is selected)
- Start and end dates
- Daily advertising budget
- Advertising Cost of Sales (ACoS) target
- Bid management type
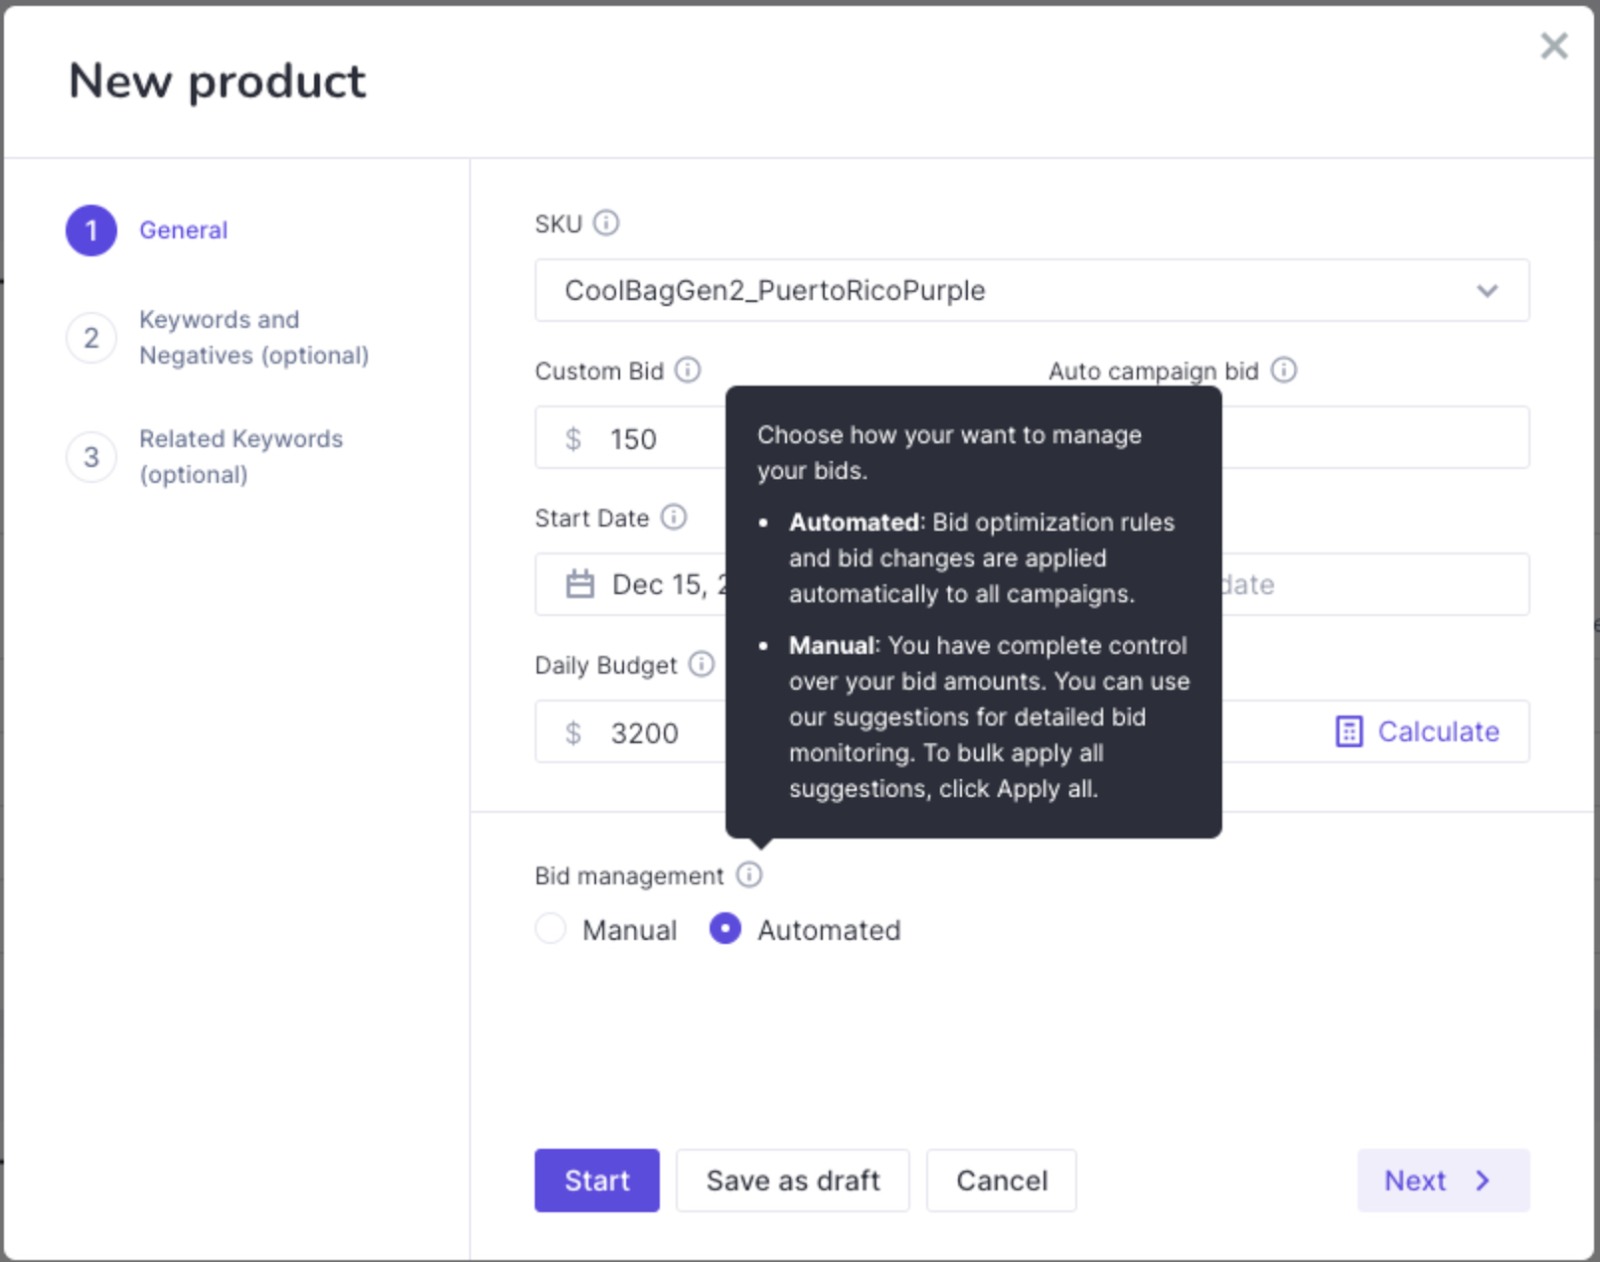
The Bid management type allows you to select the desired level of control over your bids.
- Automated: All the bid changes and rules are applied to all campaigns automatically, helping you reach your target ACoS.
- Manual: Hands over the control over your bids to you and offers suggestions for changes and bid monitoring.
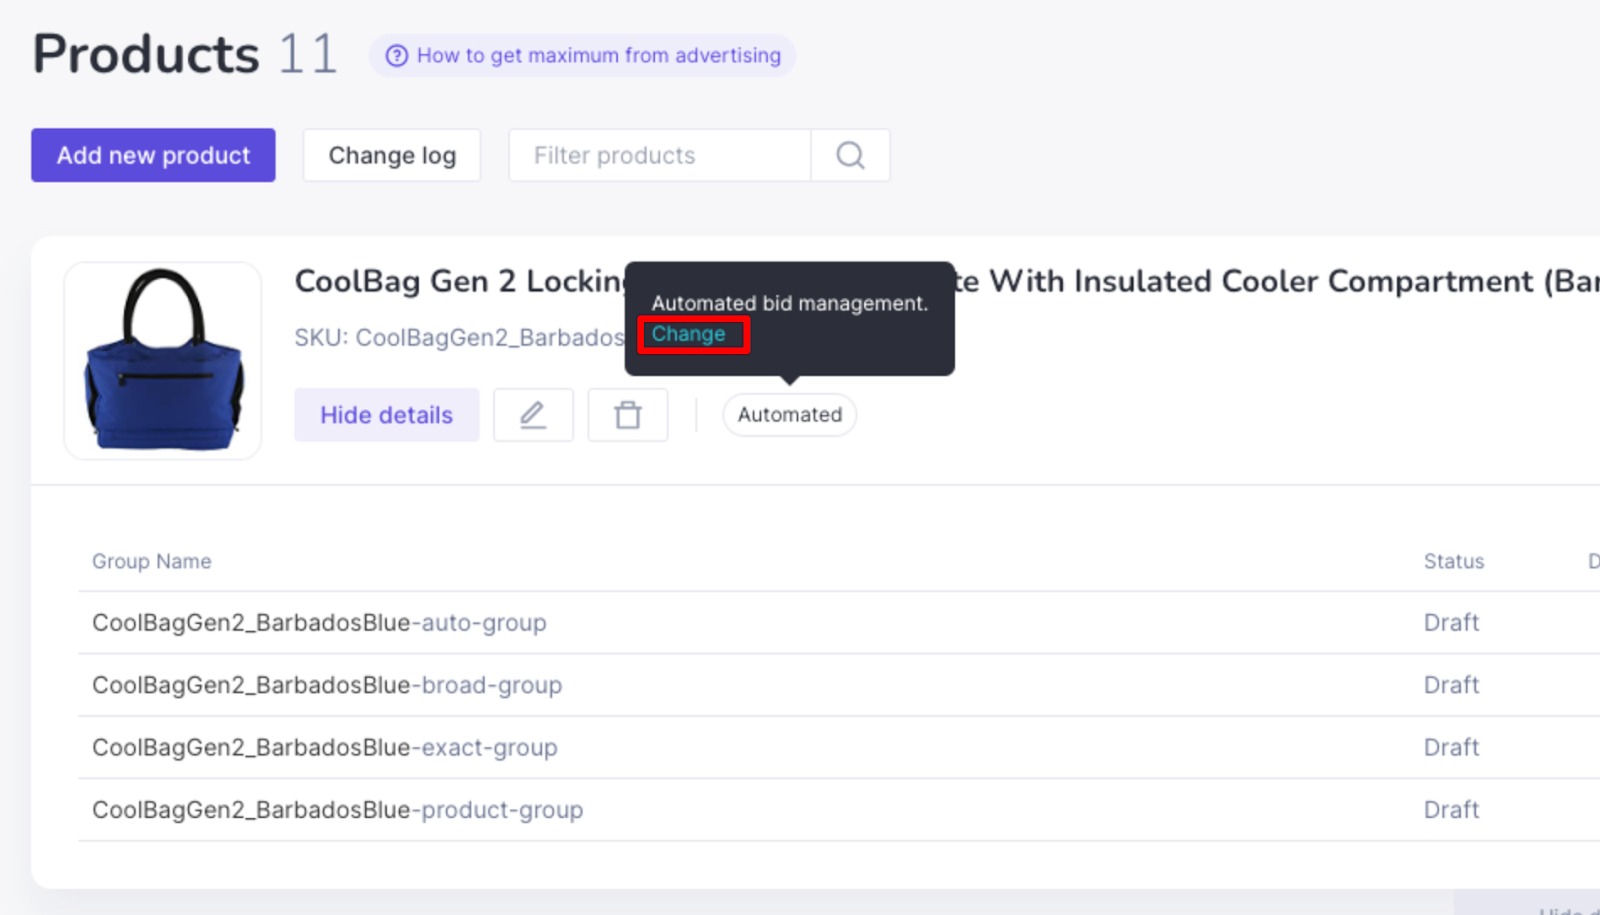
If you need to change the bid management preferences in the created scenario, it can be done by clicking on the bid management status and then on the “Change” button.
Step 4. Keywords & negatives (optional)
You can also specify any keywords that you wish to include or exclude.
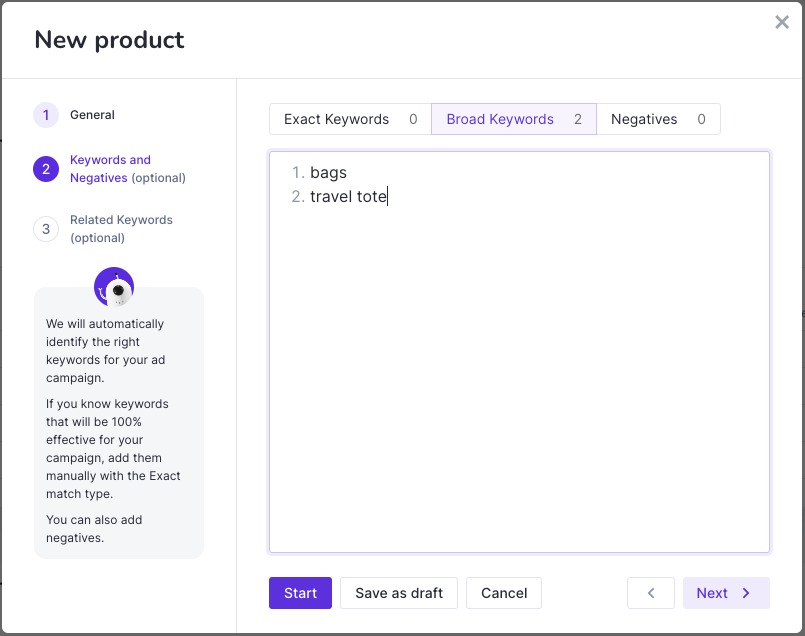
If you’ve done your research and you know which lucrative keywords you want to target, and which negative (competitor) keywords you want to eliminate, you can add those at this step. Entering these keywords and negatives is optional. If you can’t find any keywords, the app will do it for you automatically.
Next optional “Related Keywords” step can help you find keywords related to your product and may offer additional opportunities in terms of targeting.
Once you hit “Start,” your product list will be generated.
Step 5. Run your scenario
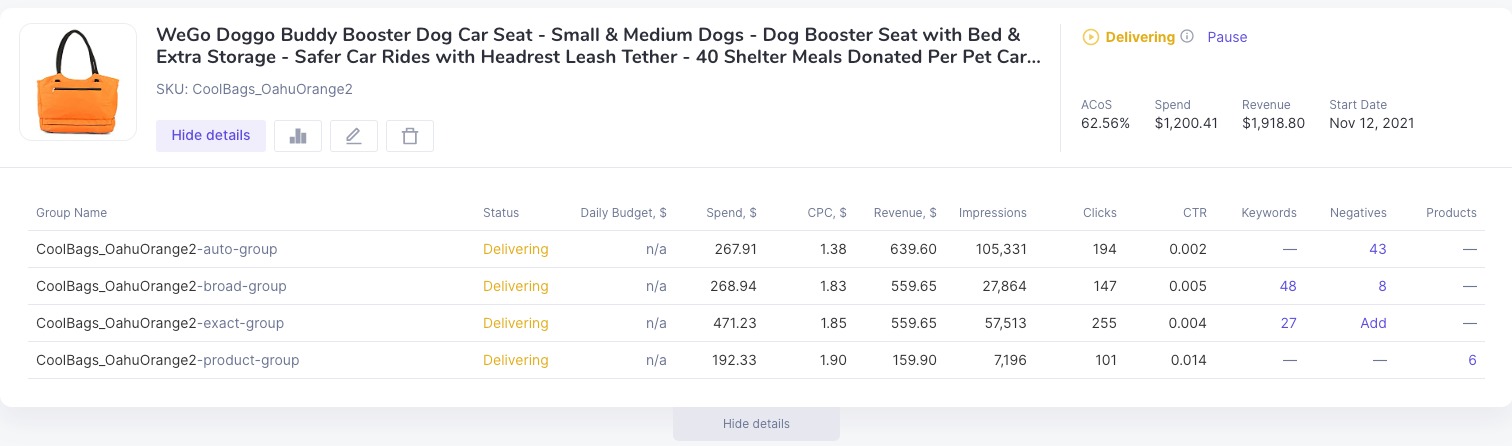
The app will create four campaigns for each of your products (these are visible from your Amazon Advertising account). For example, if you schedule scenarios for 10 products, then you’ll see 40 campaigns in your Advertising Account.
- Auto campaign: shows your product ads for keywords or ASINs gathered by Amazon
- Broad campaign: lists the keywords the app has gathered that convert and are relevant to your product
- Exact campaign: lists the keywords transferred from the Auto group or Broad group that bring you sales
- Product campaign: if your product ad is shown on another product’s listing and brings sales, such ASINs will be collected in this group.
Auto campaign is intended to gather the most relevant keywords/ASINs for your product. The most effective of these are then moved to Broad campaign or Product campaign (when this happens, those keywords or ASINs are automatically included as negatives for the previous campaign). With each new sale, the campaign will then become more optimized.
If a keyword from Broad campaign makes a listing convert, it is moved to the Exact group and is targeted with Exact match.
This way, the app optimizes your scenario on the go, changing keywords, product targetings, and even bidding strategies—all to meet your entered specs (target ACoS, total budget, and duration).
Step 6. Dive deeper into your scenario insights
When you click on the Show Details icon, you can also see more detailed information for the scenario.
Frequently Asked Questions
While you can make changes to running campaigns from your Amazon account and not from PPC Optimizer, it’s highly recommended not to make edits from your Amazon account manually in running campaigns.
If you have any questions about the PPC Optimizer for Amazon app, please email us directly at ecommerce-apps@semrush.com