You want to leverage the full power of Amazon PPC while keeping your PPC costs as low as possible. You may find it challenging to keep track of keywords, ad campaigns, ad groupings, their performance, and constant optimization. The PPC Optimizer for Amazon app helps users build and refine Amazon advertising campaigns by:
- Polishing existing ad content — Once the app learns your ASIN, it will find a list of relevant keywords and add them to your ad campaign for better optimization.
- Harvesting lucrative keywords — Each user’s search query that leads to a sale triggers the app to set a parameter so that the right keyword is matched to, and created in, the right ad campaign.
- Creating a list of negative keywords — The app isolates negative keywords, which allows you to avoid keyword cannibalization and/or competition overlap.
- Faster data synchronization — Synchronization occurs once every hour. This means you’re always up-to-date on what’s happening in the Amazon ad landscape.
*If you need a complete guide to Amazon advertising in 2022, check out Sellzone’s guide for beginners. To learn the most actionable strategies for optimizing your Amazon PPC campaigns, read this post.
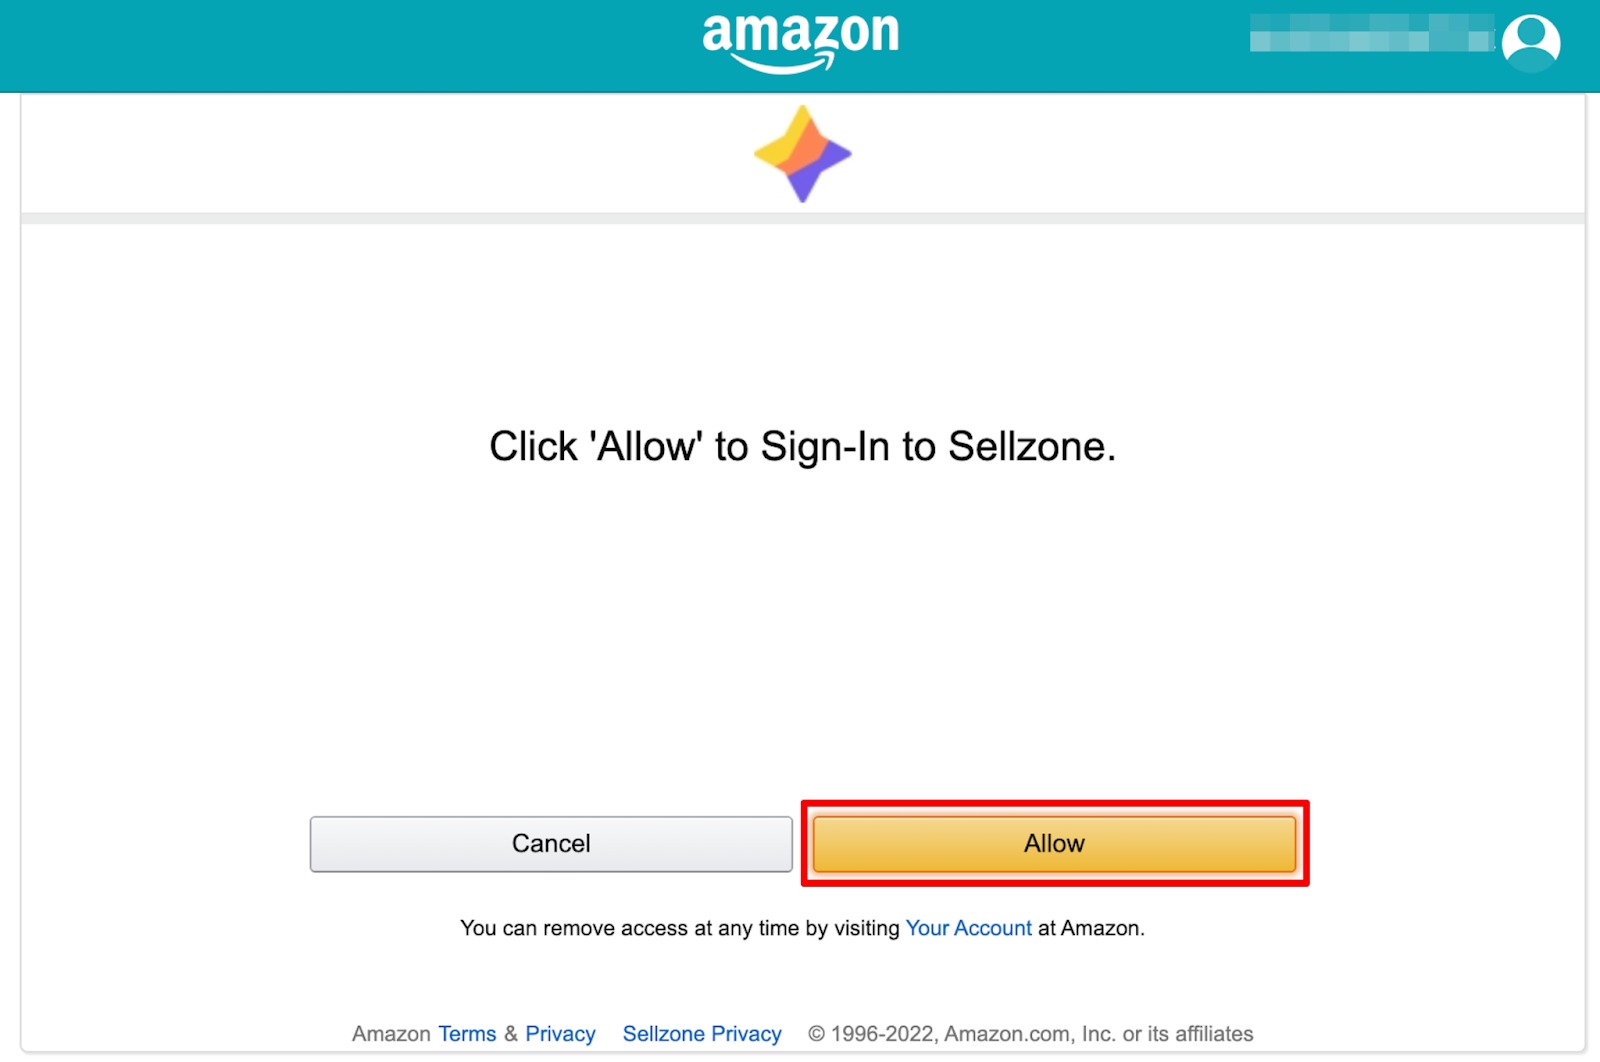
1. Share access to your Amazon account and do a token transfer
Before setting up the app, you’ll need to give Semrush access to your Amazon ad account and your Amazon Seller Central. Once successfully integrated, the setup wizard will launch automatically.
2. Define the product (SKU) you want to advertise
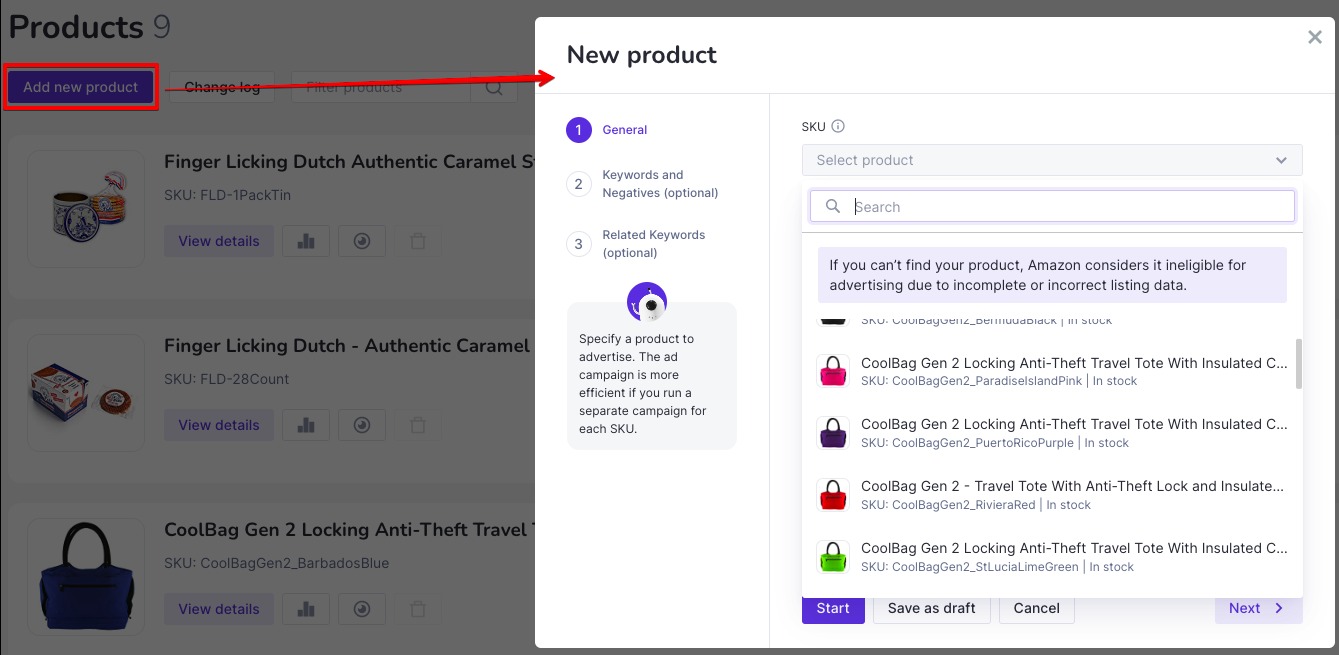
The app will pull all of your products from Seller Central and put them into a list. If you have a lot of products listed, you can use the search bar to find what you are looking for. Currently, this integration is the only way to add SKUs. More methods may appear in the future.
3. Set up your ad scenario details
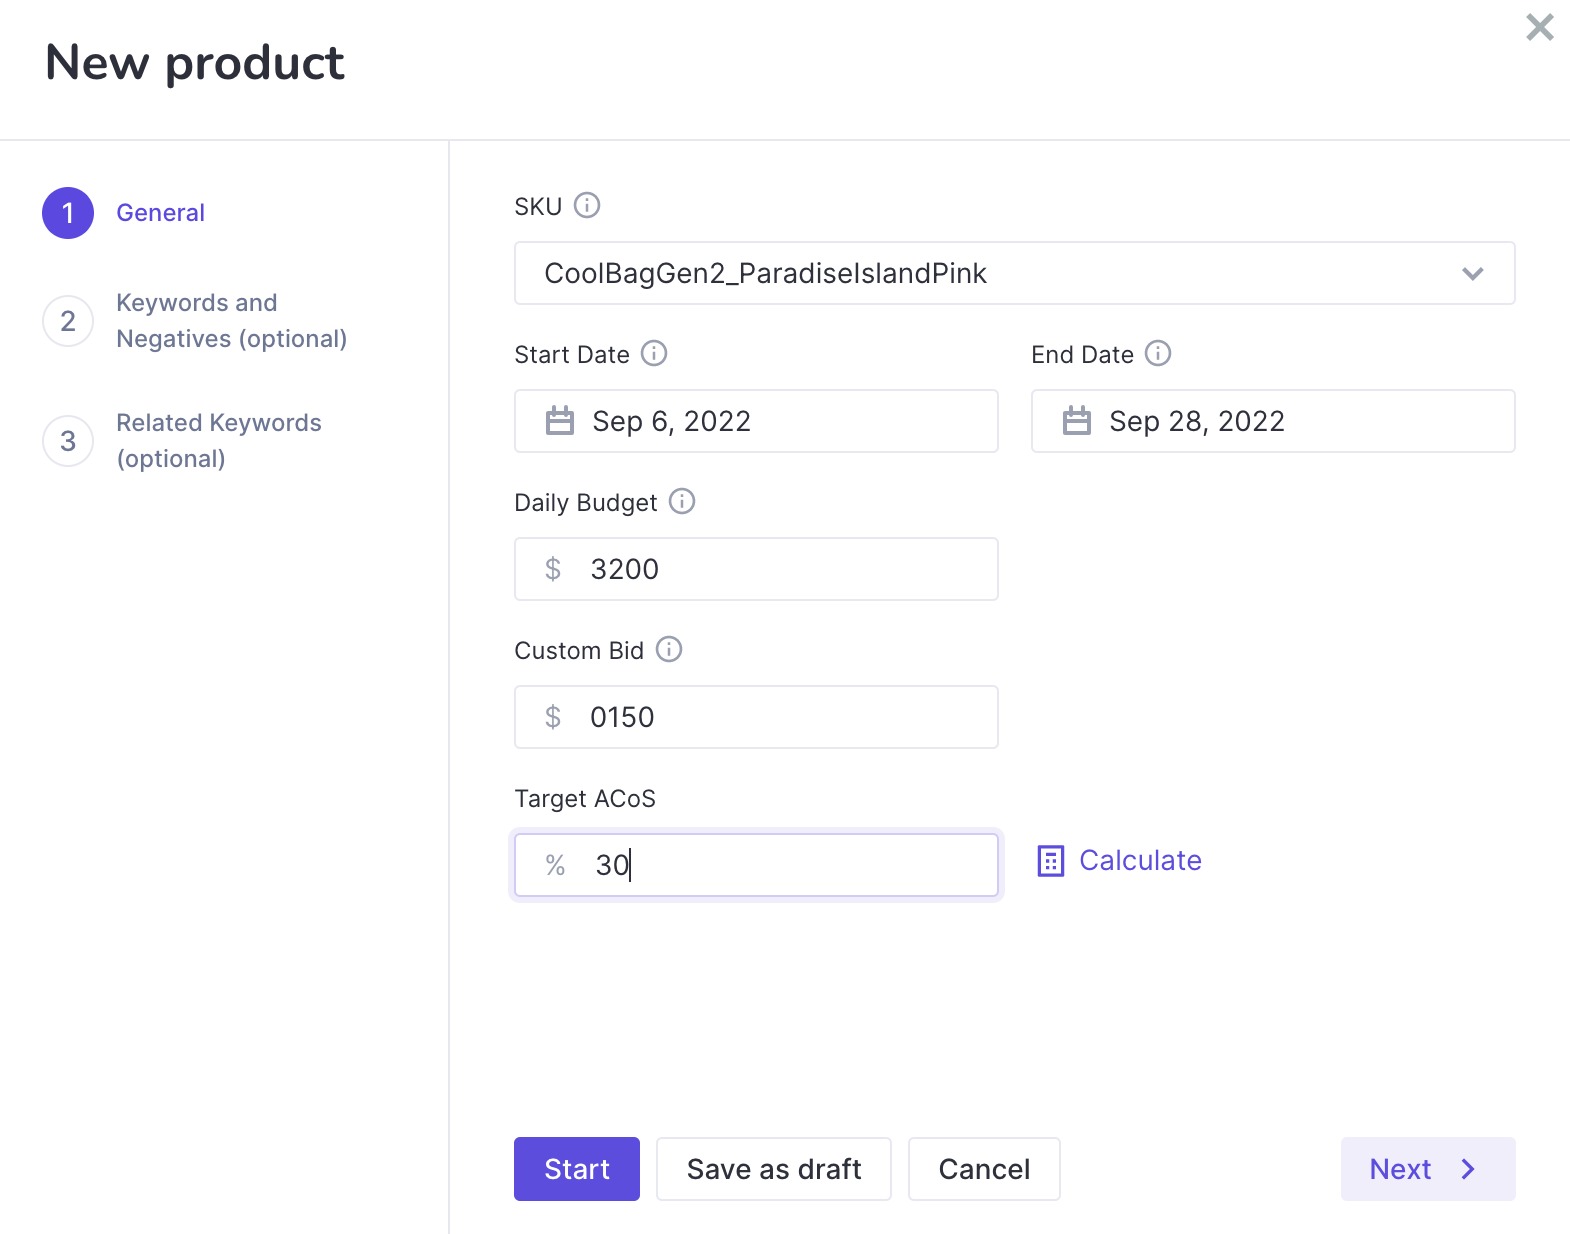
Before starting your scenario (the umbrella term for the four campaigns), you will need to add in your basic parameters. By default, the completion date is left blank. All other parameters must be set before hitting the “Start” button.
It’s important to remember:
- There are four setup options: auto, manual — keyword harvesting (broad and exact), and manual — product harvesting.
- The values specified in each field will be applied to all advertising campaigns that are created for this SKU.*
*The exception is the daily budget. This amount is distributed among all advertising campaigns.
4. Add your keywords and negatives (this is optional)
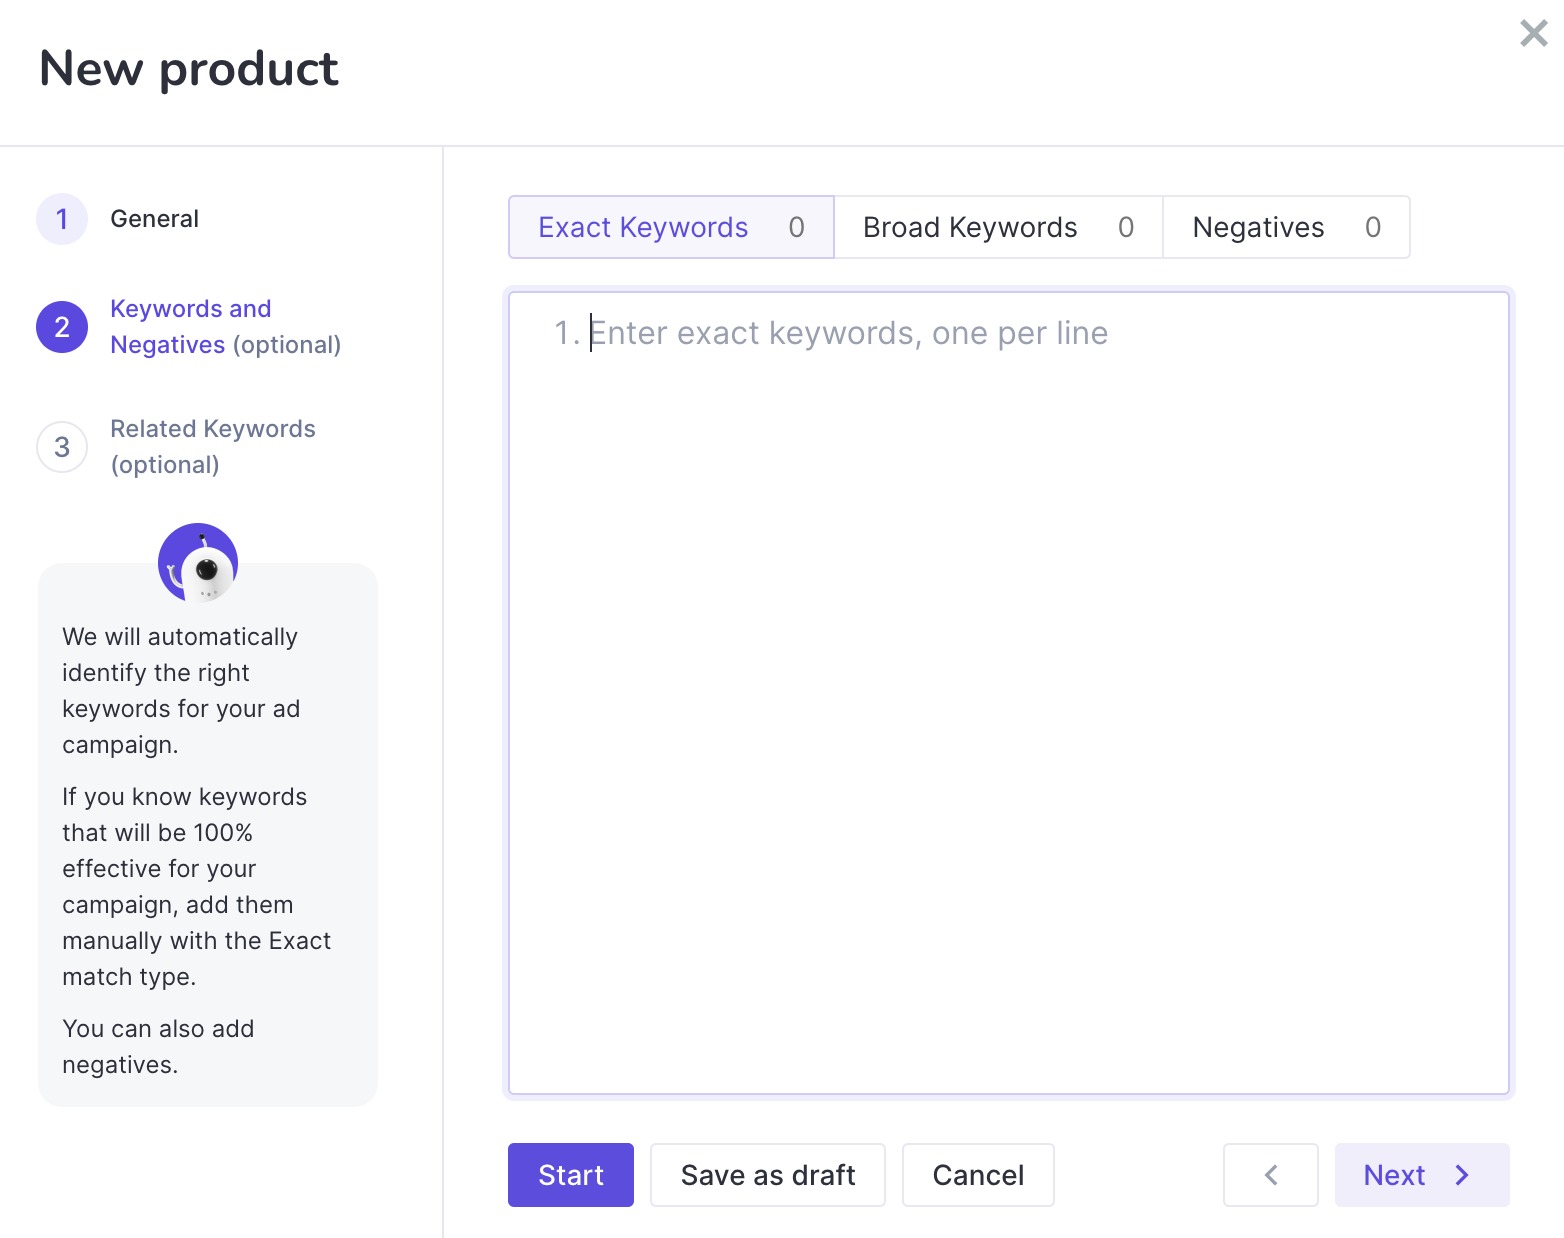
If you’ve done your research and you know which lucrative keywords you want to target, and/or negative (competitor) keywords you want to eliminate, you can add those on this page. There are separate tabs for each category. You might also want to check out what related keywords the app can find for your product. Steps 2 and 3 here are optional — if you can’t find any keywords, the app will do it for you!
5. Dive into your product list (main view)
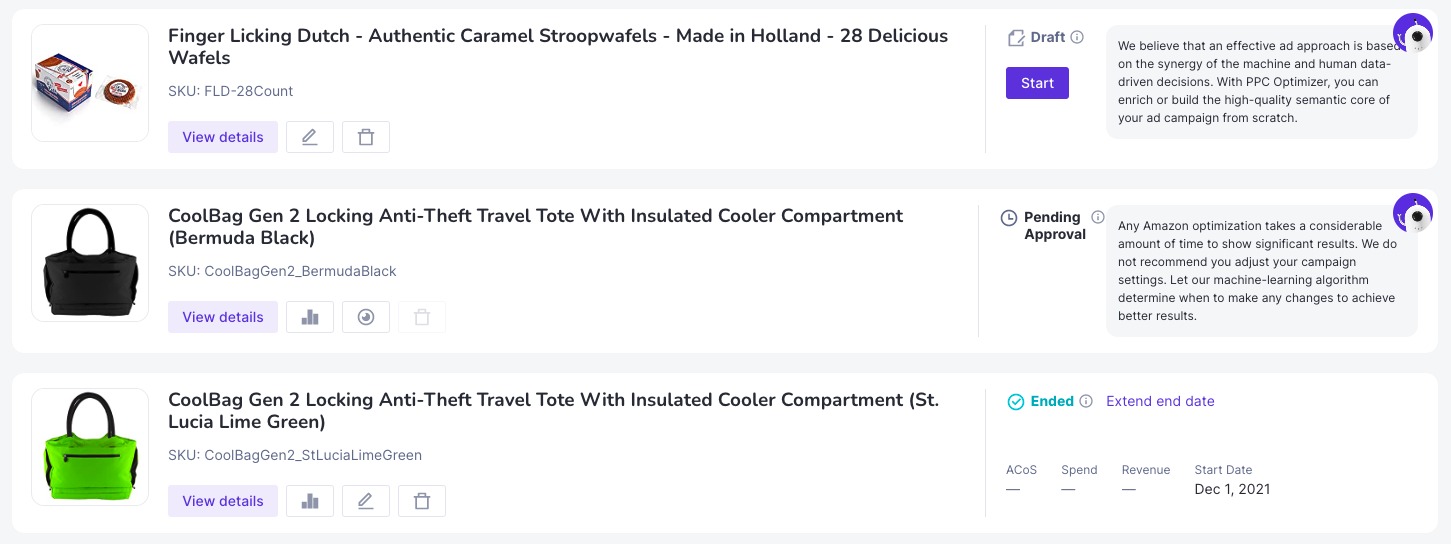
Once you hit “Start” in step 4, your product list will be generated. Depending on the current status of your advertising campaigns, different information will be displayed in the widgets on the right. As an example, if you’ve just launched an advertising campaign and it is still being verified by Amazon, then the app will reflect this. If the product is already receiving traffic, then the widgets will show that traffic data. If your ad status is anything other than “Pending Approval,” you can make changes to the settings or delete (archive) the entire scenario (four campaigns with settings).
Note: When you delete a campaign in the app, it does not delete the campaign in Amazon. The campaign will continue to work as if it was created directly through/on Amazon.
If you delete a campaign, the algorithm will no longer be able to track it. You cannot search for new keywords, isolate weaker keywords, or search for new products. You’ll get a pop-up window warning you about this after you hit “Delete.”
6. Dive deeper into your product list (detailed view).
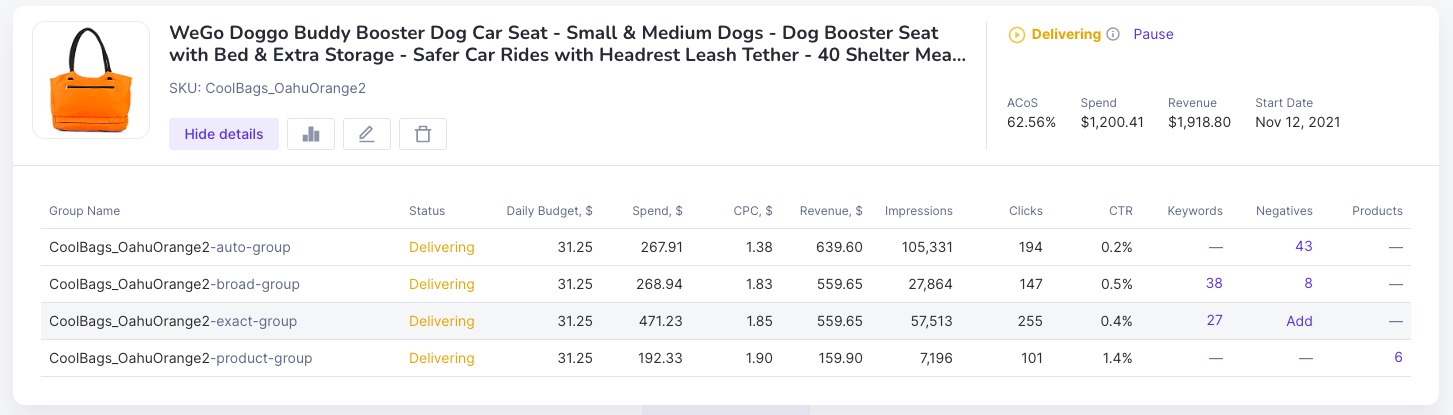
This view allows you to see more detailed information about your campaign.
7. Evaluate your keyword performance in the Keyword Manager window
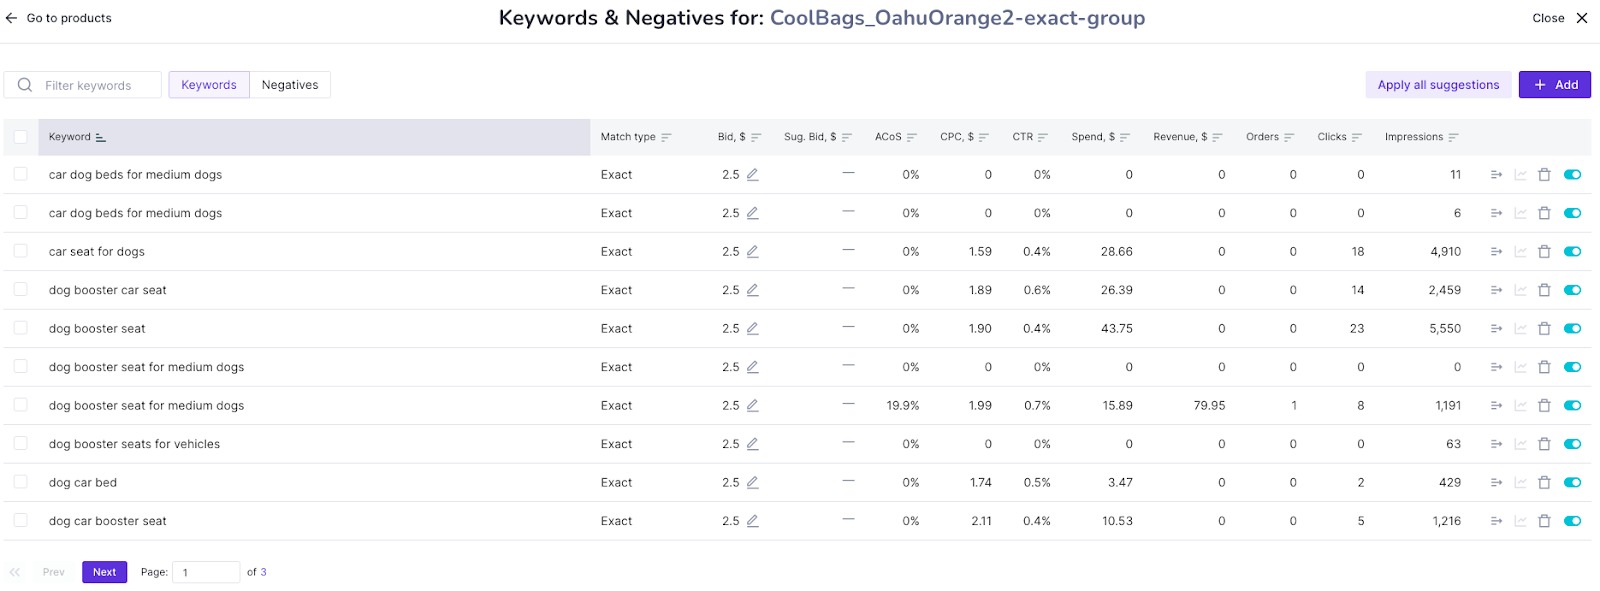
From the window in step 6, you can go to the Keyword Manager by clicking on the number in the “Keyword” column. Here, you can look at keyword metrics and evaluate their performance.
You also have access to several keyword management functions. For example, you can pause keywords, move certain poorly performing keywords to the negative keyword column, change the value of the bid for a specific keyword, change the type of keyword/product match, and check out other valuable metrics.
8. Get keyword reports
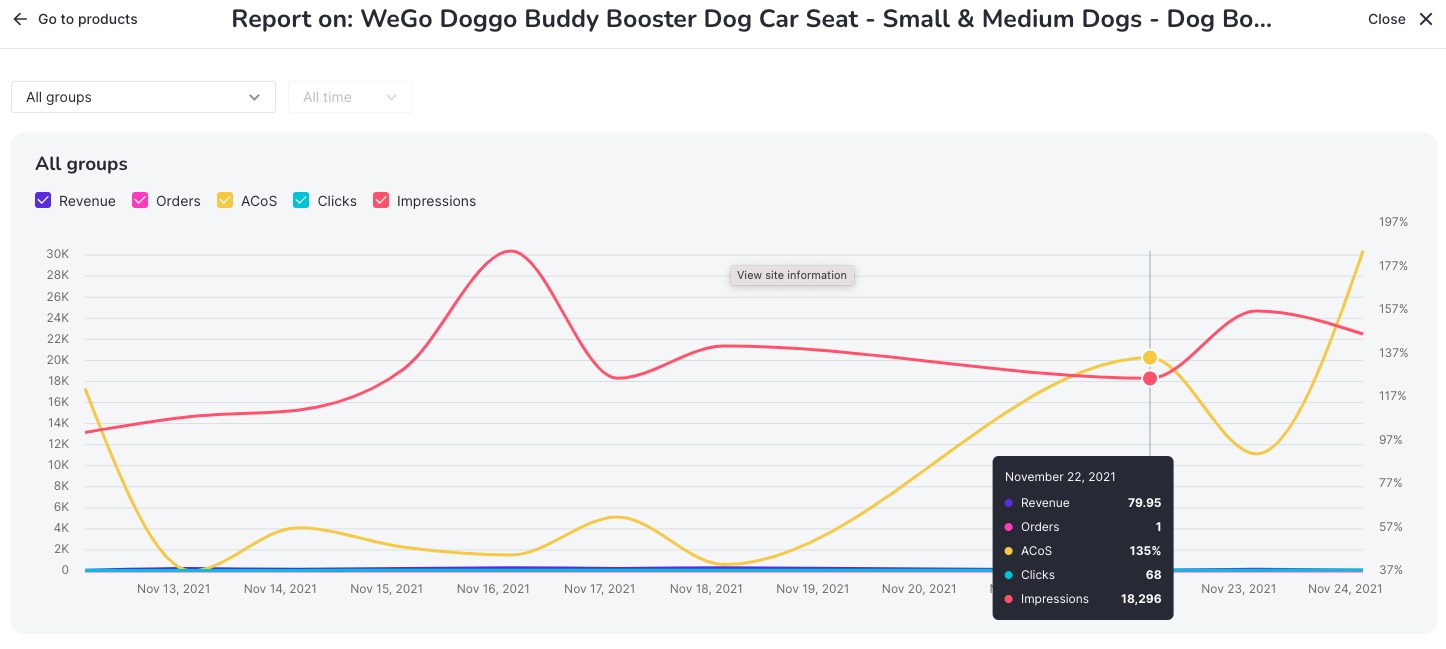
At this time, the app allows you to pull five reports: Revenue, Orders, Advertising Cost of Sale (ACoS), Clicks, and Impressions. You can also set the time range you want for these reports and you can specify the detail level of the reporting—whether you want the entire summary of all campaigns or a specific campaign.
9. Learn how Semrush is selecting your keywords
The PPC Optimizer for Amazon app is designed to make life easier for you as an Amazon seller. By automating the keyword selection process for your ad campaigns, the app allows you to devote your valuable time to other projects and business. The rules for selecting and adding keywords, forming a semantic core, and adding new targets and negatives work in the background and aren’t in any main view for the user to see.
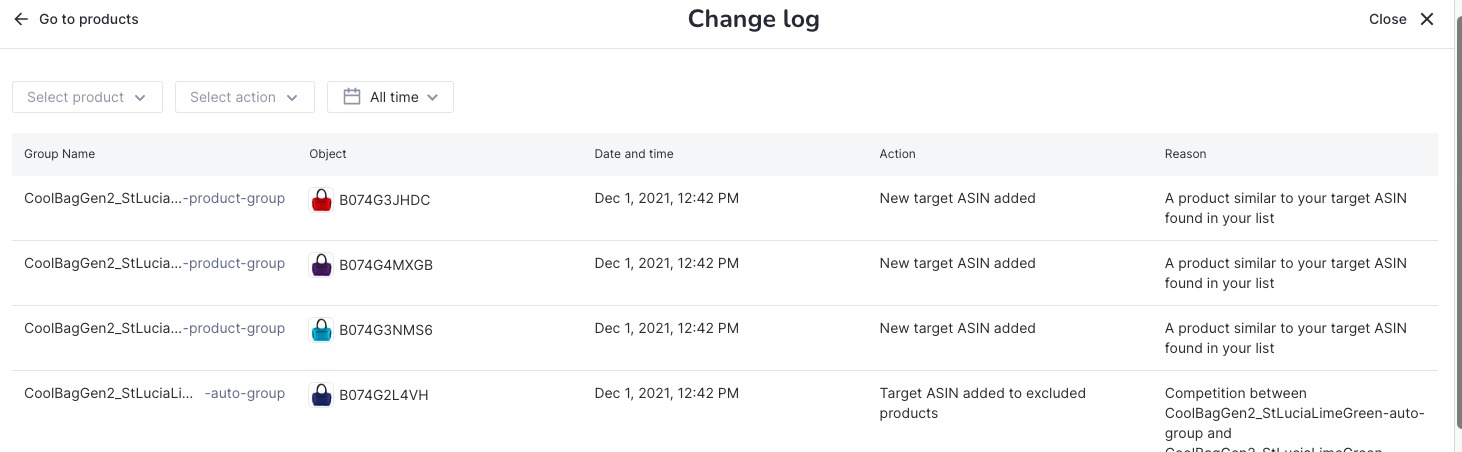
We know that when you give us access to your Amazon account and allow the app to help you select ad keywords, this requires trust. To increase transparency, we created the Change Log. This log shows you each action the app makes with your keywords. Actions can be filtered by type and sorted by different values.
This is a great report to look at if you’re curious to see just how much work goes into forming these keyword-focused ad campaigns. Seeing the work that goes on behind the scenes really emphasizes why having a tool like the PPC Optimizer is great for relieving the stress of ad campaign creation.